Quick Installation Guide
In order to make the groupios installation as easy as possible we employ a preconfigured ISO image. This image is based on the open source enterprise Linux distribution AlmaLinux. In order to install groupios, the following steps need to be done:
- Download, boot and install the ISO image
- Boot groupios
- Use the groupios command line interface to finish the installation
- Connect to the graphical user interface
Attention
Currently, manual intervention is required to fully license the groupware component once the main domain has been configured. For more information, please refer to the section on troubleshooting titled IMAP/POP3, ActiveSync, and MAPI not functioning, while WebApp is accessible.
Ports
The following ports need to be open for the host system:
| Protocol | Port |
|---|---|
| SMTP | 25,587 |
| IMAP | 993 |
| POP | 995 |
| HTTP(s) | 443, 80 (optional) |
| SSH | 22 (optional) |
Download, boot and install the groupios ISO image
The ISO file can then be either booted inside a virtual environment or on a bare metal server. In either of those settings several requirements need to be set. The minimal requirements are as following:
-
200 GB Hard Disk Space
-
16 Core
- min. 64 GB RAM
- 1 Gigabit Network Interface
Note
In order to boot on a bare metal server the image needs to be burnt to a CD or be flashed to a USB drive.
The system supports Legacy BIOS and UEFI.
1) After a successful boot the groupios installation summary will show up. Here you are able to configure the keyboard layout, timezone, installation destination and network settings.
The installation will not continue, unless you select a hard drive for installation (1):
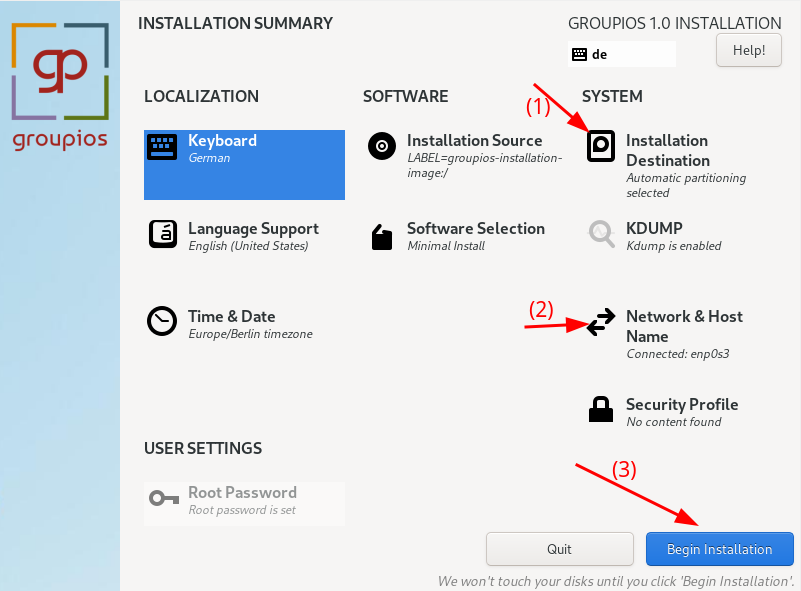
2) When clicking on "Installation Destination" (1) you will be able to select the hard drive where groupios will be installed. We highly recommend choosing "Custom" storage configuration,
as the automatic configuration creates a home partition occupying most of the space. 
Note
Most content is stored within the / partition. We recommend to use only one partition. If you configure multiple partitions, assign most free space to /. Make sure your selected drive is marked with a check icon. You might need to double click the drive.
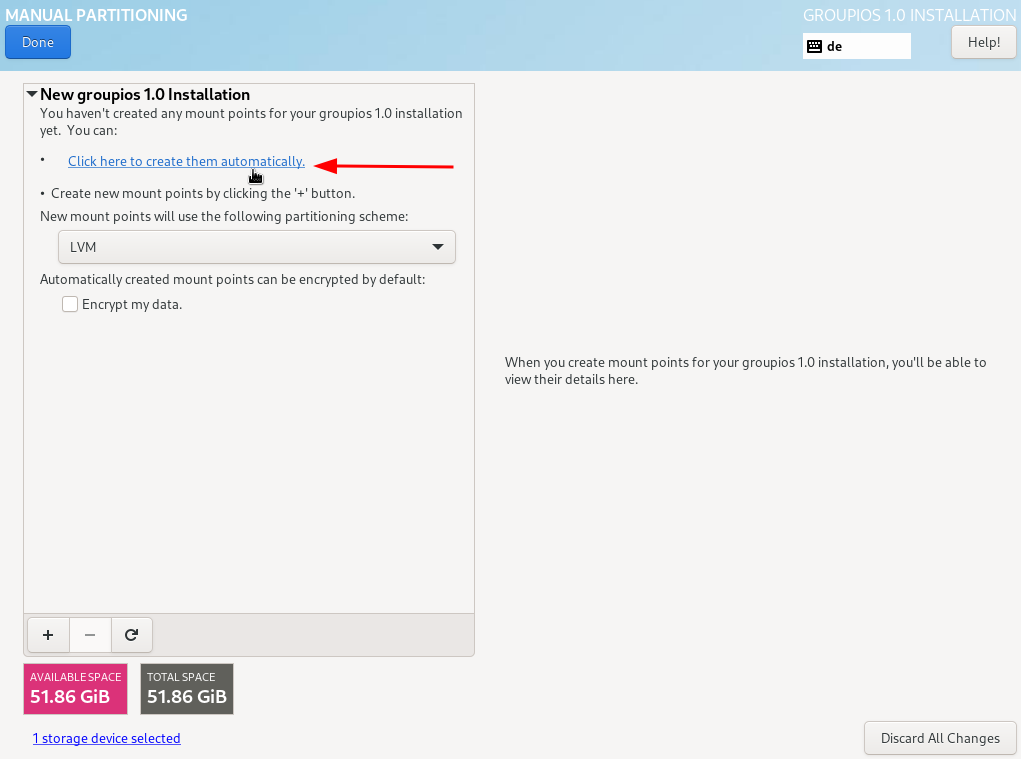
3) Since groupios heavily relies on docker, which by default stores everything under /var/lib/docker/ we recommend to use only one partition assigned to /.
To do this, select on the following screen "Click here to create them automatically". This creates next to the root and home partition, a swap partition as well as a boot partition.
4) In the following we remove the home partition.
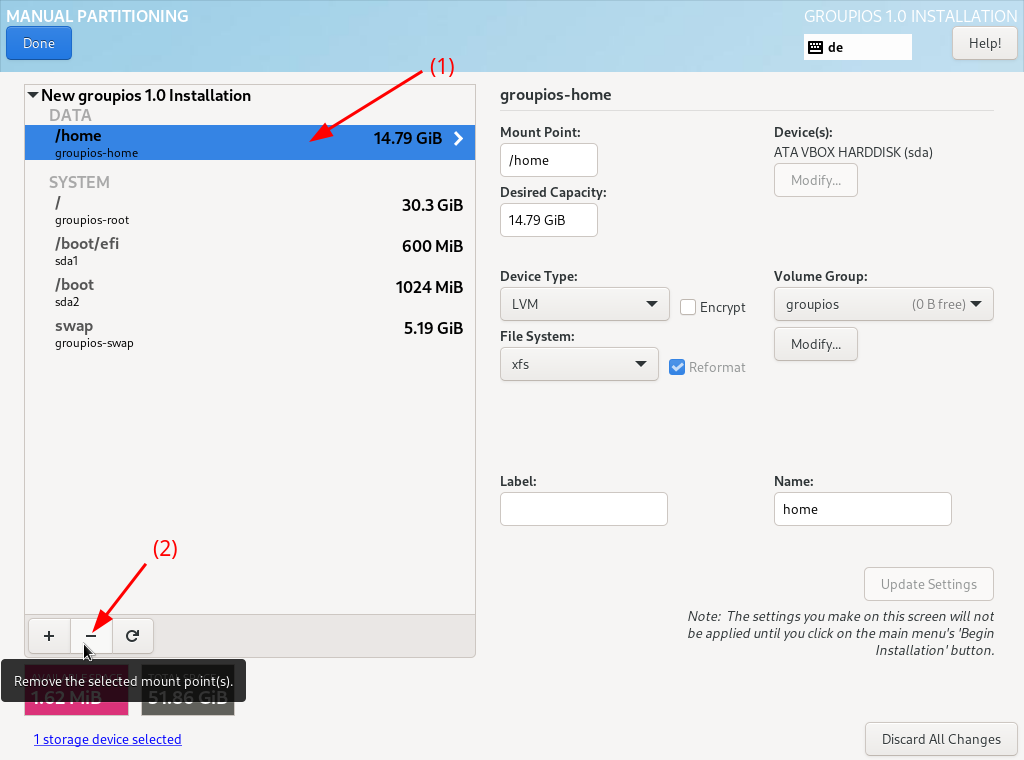
5) Afterwards, make sure to assign the remaining space to the root partition /.

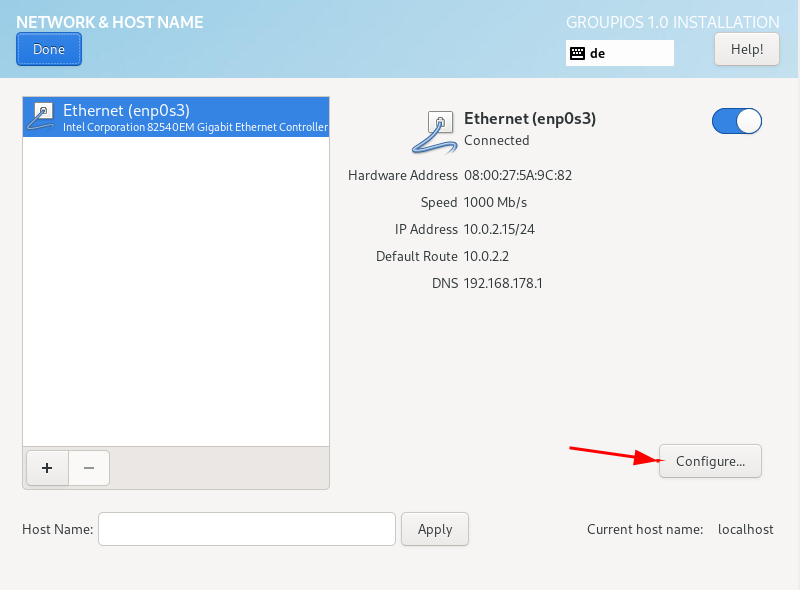
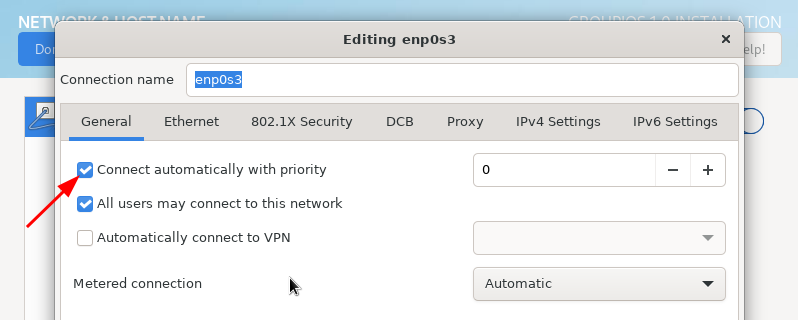
6) We also advice, checking under "Network and Host Name" (2) if the correct network interface is select and enabled by default.
7) Afterwards the user can click on "Begin Installation" (3) to start the installation process.
Boot groupios
After installation you need to reboot the system by clicking on "Reboot System". Depending on the system you need to remove the installation medium before doing so. After booting the systemm will prompt the user with a login screen, for which the credentials are as following:
- Username:
groupios - Password:
changeme
Note
After the first boot the user will be prompted to change the default password.
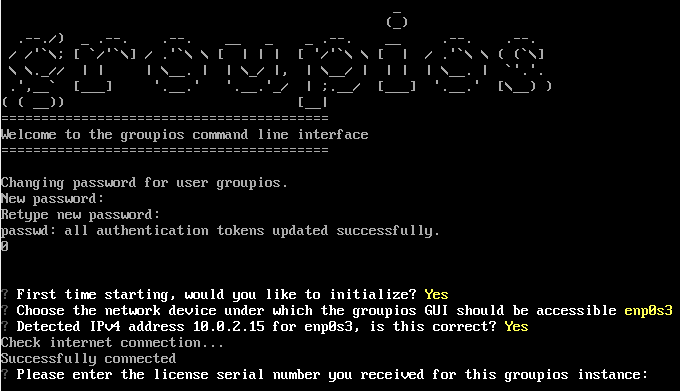
Use the command line interface
After logging in, the user will be welcomed by the groupios command line interface. Here we are able to set our network configuration and some general first configurations.
Connect to graphical user interface
 At the end of the installation process we will see the URL
under which the GUI can be accessed. Following this URL we are greeted by the groupios login
screen. Here we use the sysadm user credentials to login. First steps are described here
At the end of the installation process we will see the URL
under which the GUI can be accessed. Following this URL we are greeted by the groupios login
screen. Here we use the sysadm user credentials to login. First steps are described here
Note
The sysadm credentials are set during the initialization in the groupios command line interface. The default password is changeme