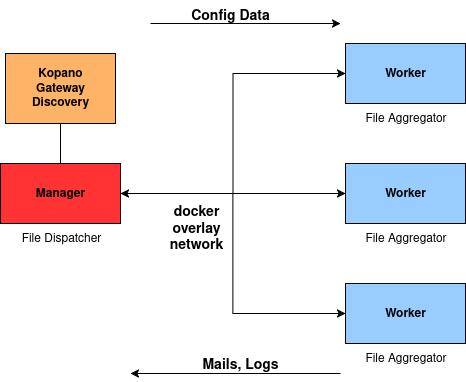
Worker
Worker are replicas of the main gateway instance running on the manager. This enables the gateway component to be scaled in order to achieve redundancy, load balancing and higher availability. The load is distributed among the workers either randomly, according to predefined priorities, or using a round-robin method (fair, cyclic algorithm).
Note
Your license must include the worker option.
Manager Initialization
Upon first start the manager initialization is similar to that of a single instance, see installation Quickguide.
-
After the license is checked and your license is qualified for a worker setup you have the choice to either initialize a worker or a manager node.

-
Choose
Managerto initialize the node as manager instance. -
Even after selecting
Manager, you can still opt for a standard single-machine installation at this stage, postponing the manager initialization for a later time. To continue the manager initialization pressy.
-
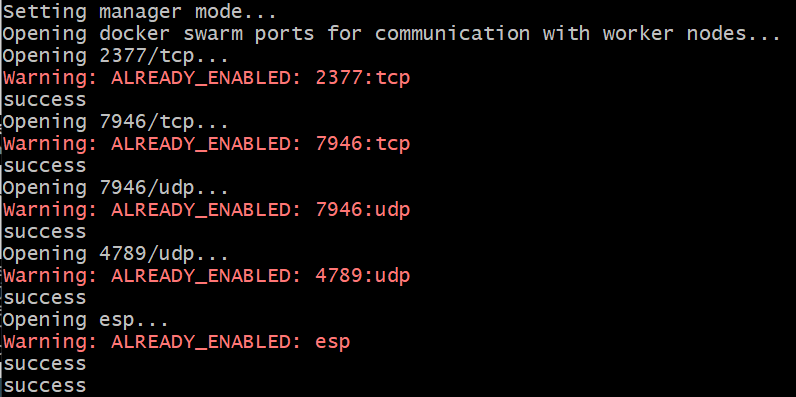
Make sure that the manager node and worker node can reach each other via the following ports as specified by docker swarm. The command line tool automatically opens the necessary ports on the hosts, but cannot do this for the network:
- Port 2377 TCP for communication with and between manager nodes
- Port 7946 TCP/UDP for overlay network node discovery
- Port 4789 UDP for overlay network traffic
- IPSec ESP traffic is allowed
-
The system offers the IP which is found for NIC chosen during initialization, you can change it with the option
n. This is primarily for the communication of the docker overlay network. See the official docker documentation for more information.
-
After completing the configuration, the
Join Tokenis displayed. It is needed to join the workers to the manager.
Note
The key can be viewed via the command line option
Email Gateway --> Show Join Tokenon the manager node.The groupios containers and services will be restarted. The welcome screen displays
groupios manager is runningto indicate that the worker has started successfully.
Should you already have a single instance running you are able to upgrade to a manager.
-
Log in to your groupios instance. If the groupios welcome dialog is not displayed, navigate to your installation folder
/home/groupios/and start it with the call:./greeter. -
Select
E-Mail-Gateway.
-
Upgrade your server with the option
Upgrade to Manager.
Note
The Upgrade to manager is only accessible when groupios has already been installed as a Single Instance. If the system is freshly initialized the admin has the option to directly initialize groupios as a manager, hence no need and no option to
Upgrade to manager.
Configuration groupios Worker mode
As shown in the diagram above, the workers run on a separate instance. One or more worker can be deployed in the groupios network. The installation of the worker is similar to that of the manager, see installation Quickguide.
-
The greeter starts automatically with the initialization process. If not you can re-start the initialization by choosing
Settings -> Re-Initialize.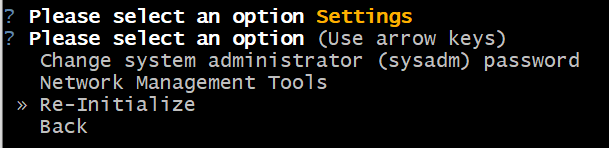
-
When prompted whether to initialize the system as
ManagerorWorkerchooseWorker.
-
The worker hostname functions as a unique identifier for the worker in the manager node’s orchestration process. Please ensure that a unique identifier is provided.

-
EHLO (Extended Hello) is the name that is sent at the beginning of an SMTP session to identify the client at the server.

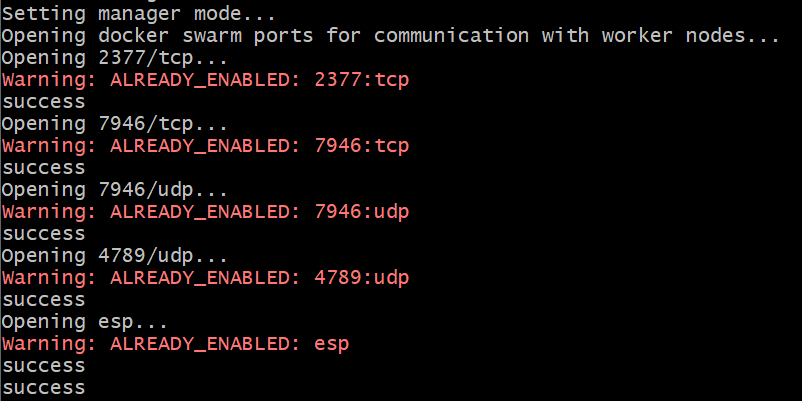
Make sure that the manager node and worker node can reach each other via the following ports as specified by docker swarm. The command line tool automatically opens the necessary ports on the hosts, but cannot do this for the network:
- Port 2377 TCP for communication with and between manager nodes
- Port 7946 TCP/UDP for overlay network node discovery
- Port 4789 UDP for overlay network traffic
- IPSec ESP traffic is allowed
-
Insert the
Join Tokenfrom the manager configuration (Manager -> E-Mail Gateway -> Show Join Token).

-
Copy the public key (at the end of the picture) of the worker node and provide it to the manager.
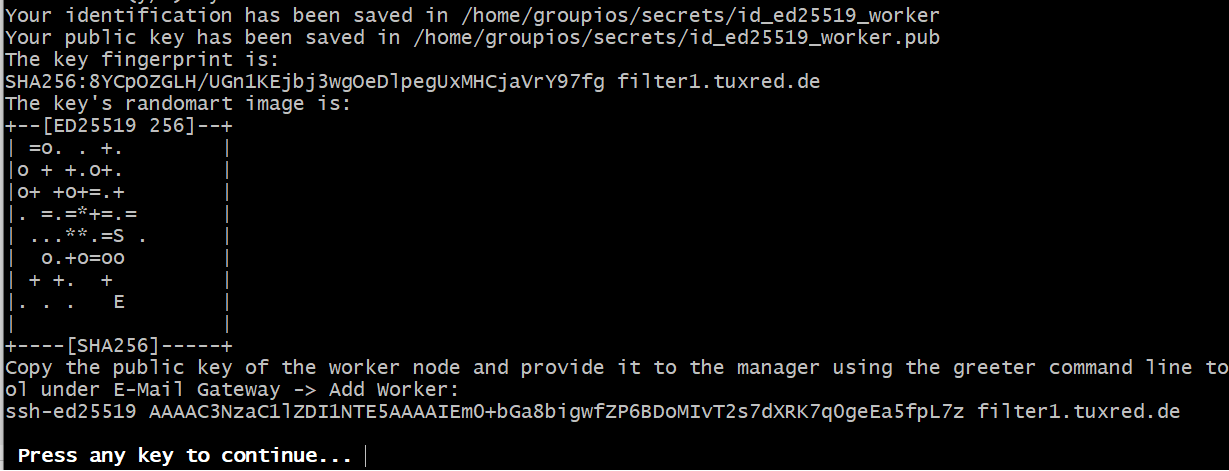
Following the command line tool creates a ssh key pair on the worker which is used in the connection to replicate the necessary files from the manager node. The groupios containers and services will be restarted. The welcome screen displays
groupios worker is runningto indicate that the worker has started successfully.
Connect Worker in Manager
Once the worker has been configured and started, it must be registered with the manager.
-
Select E-Mail Gateway.
-
Choose
Manage Worker Nodes.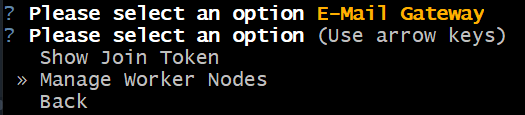
-
Select
Add Worker SSH Public Key.
-
Paste the SSH public key of the worker.

-
This shows that the worker's SSH Key has been added to the Manager.

Note
The SSH connection is established inside the docker overlay network and only necessary between the containers. The workers do not directly connect to the manager via SSH.
Worker Status
You can view the worker status in the Dashboard of the Management Interface and under Monitoring:

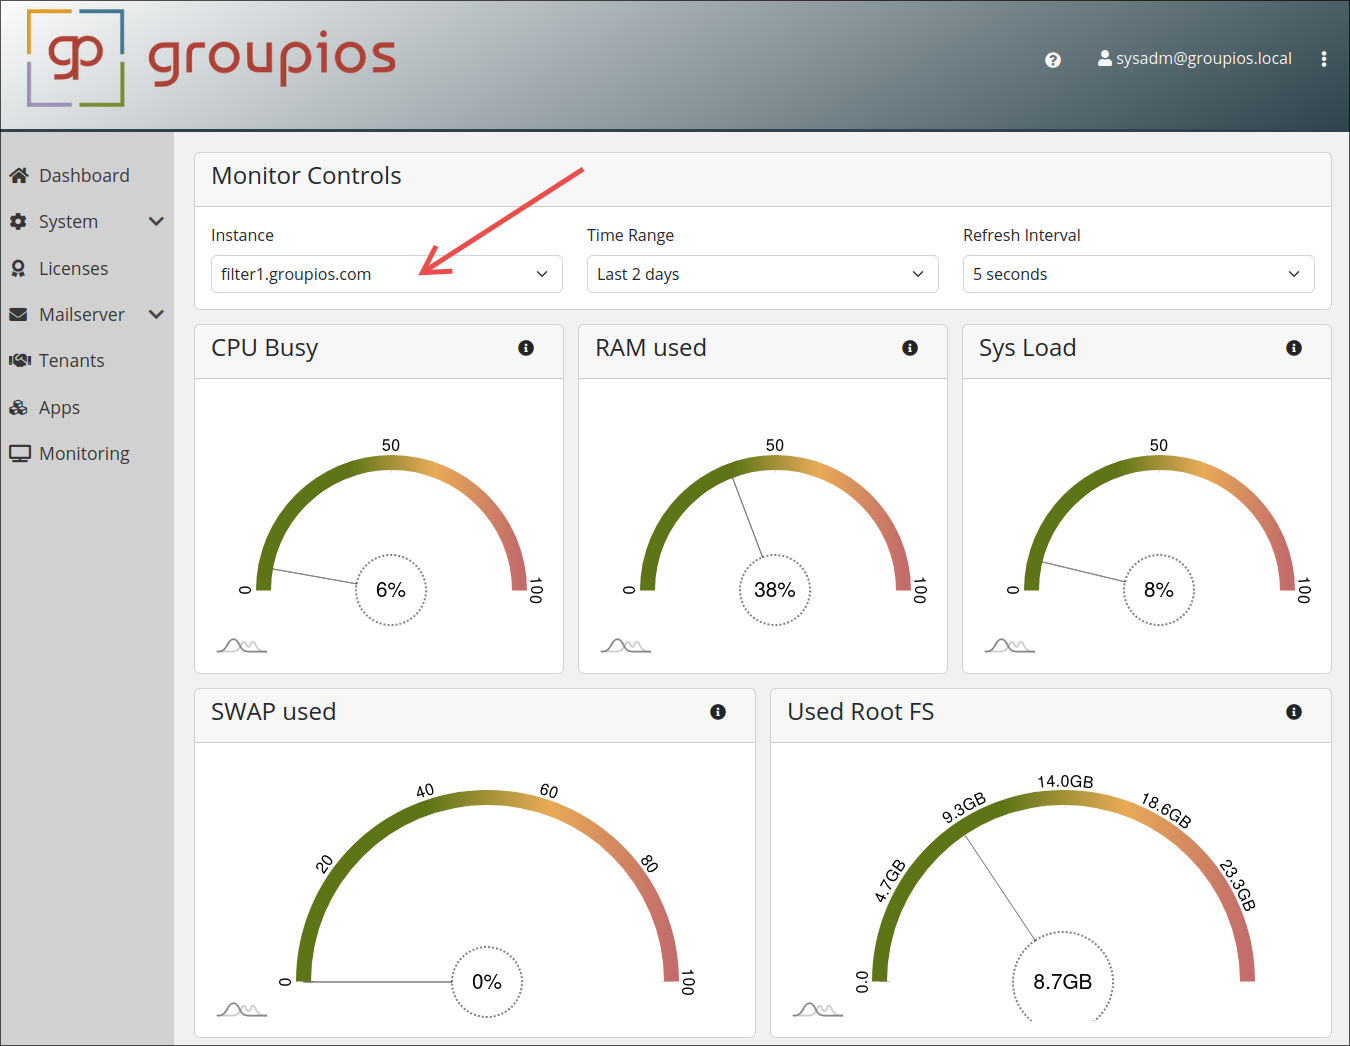
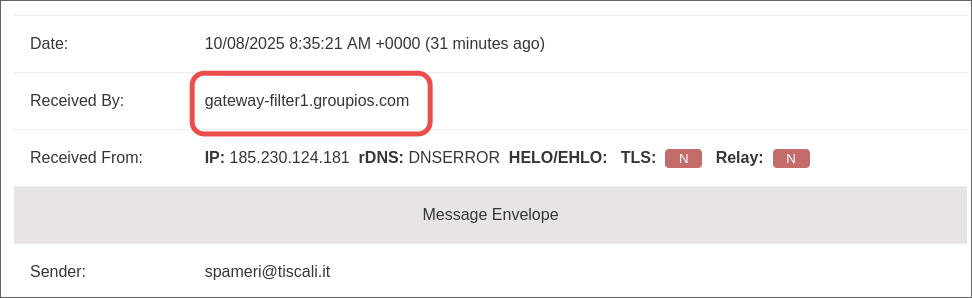
Note that each message log records which instance processed the message.