First Steps
Install Certificates
Certificates can be (1) uploaded manually or (2) generated using Let's Encrypt Certbot functionality.
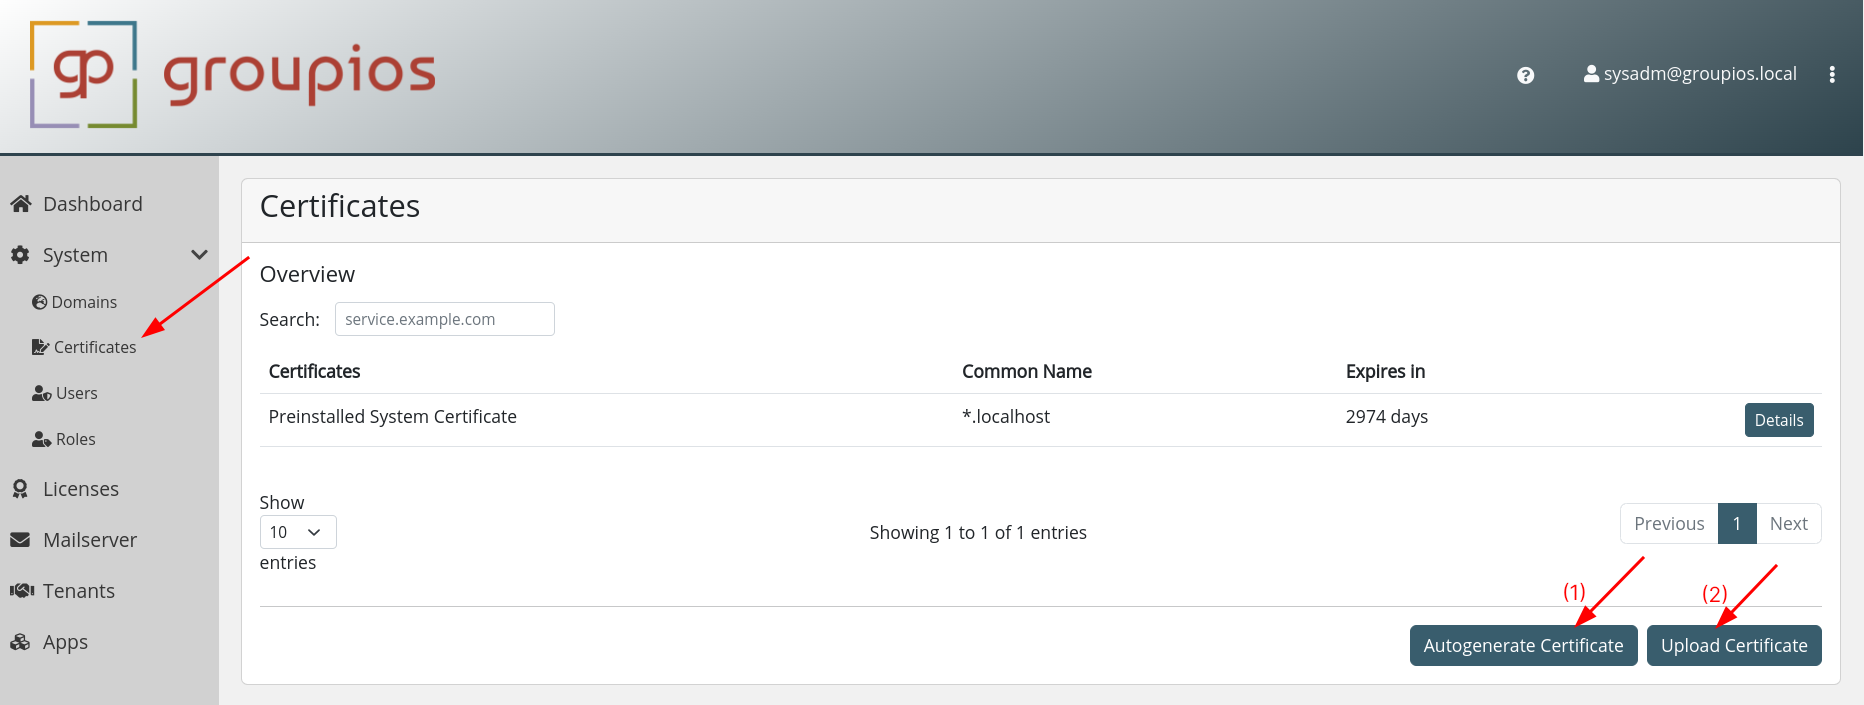
In both scenarios, it is essential that the subdomains manage, smtp, login, mail, and gateway are contained with the certificate.
For instance, configuring groupios for example.com requires a certificate covering the following domains:
- manage.example.com
- smtp.example.com
- login.example.com
- mail.example.com
- gateway.example.com
Note
If you use Let's Encrypt you'll need to point the DNS A records of all above mentioned domains to groupios. Also make sure that Port 80 is forwarded to the respective server.
Warning
When manually uploading a certificate you need to make sure, to upload the full certificate chain. Also, the certificates need to be verifiable by the root CAs.
Update the System Domain
Upon successful installation of the correct certificate, the system becomes eligible for migration to the new domain.
As shown in the picture below,
- navigate to the domains view
- click on
Change System Domain - enter the domain name you uploaded your certificate for (
example.comin this scenario) - confirm by clicking
Change System Domain

The completion of this process may take several minutes.
Subsequently, the user interface becomes accessible through the designated domain, exemplified as manage.example.com in this instance.
Note
The previous session has been invalidated due to the configuration changes. Please switch to the newly configured domain now to commence a new session. You can safely exit the current view, even if the process is not yet finished.
Add Users
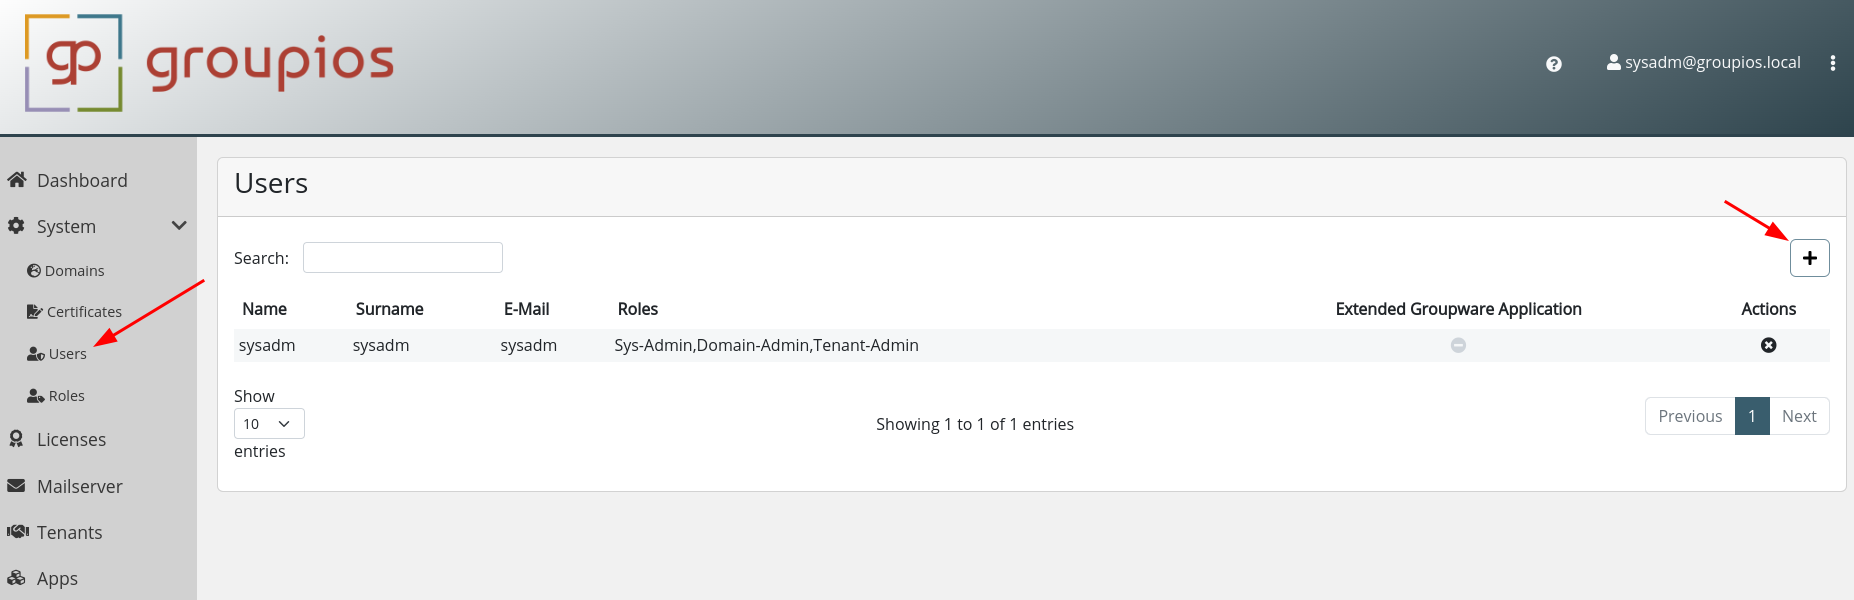
The user view is positioned immediately below the certificates view in the sidebar. To initiate the creation of your first user, select the plus icon, as depicted below.
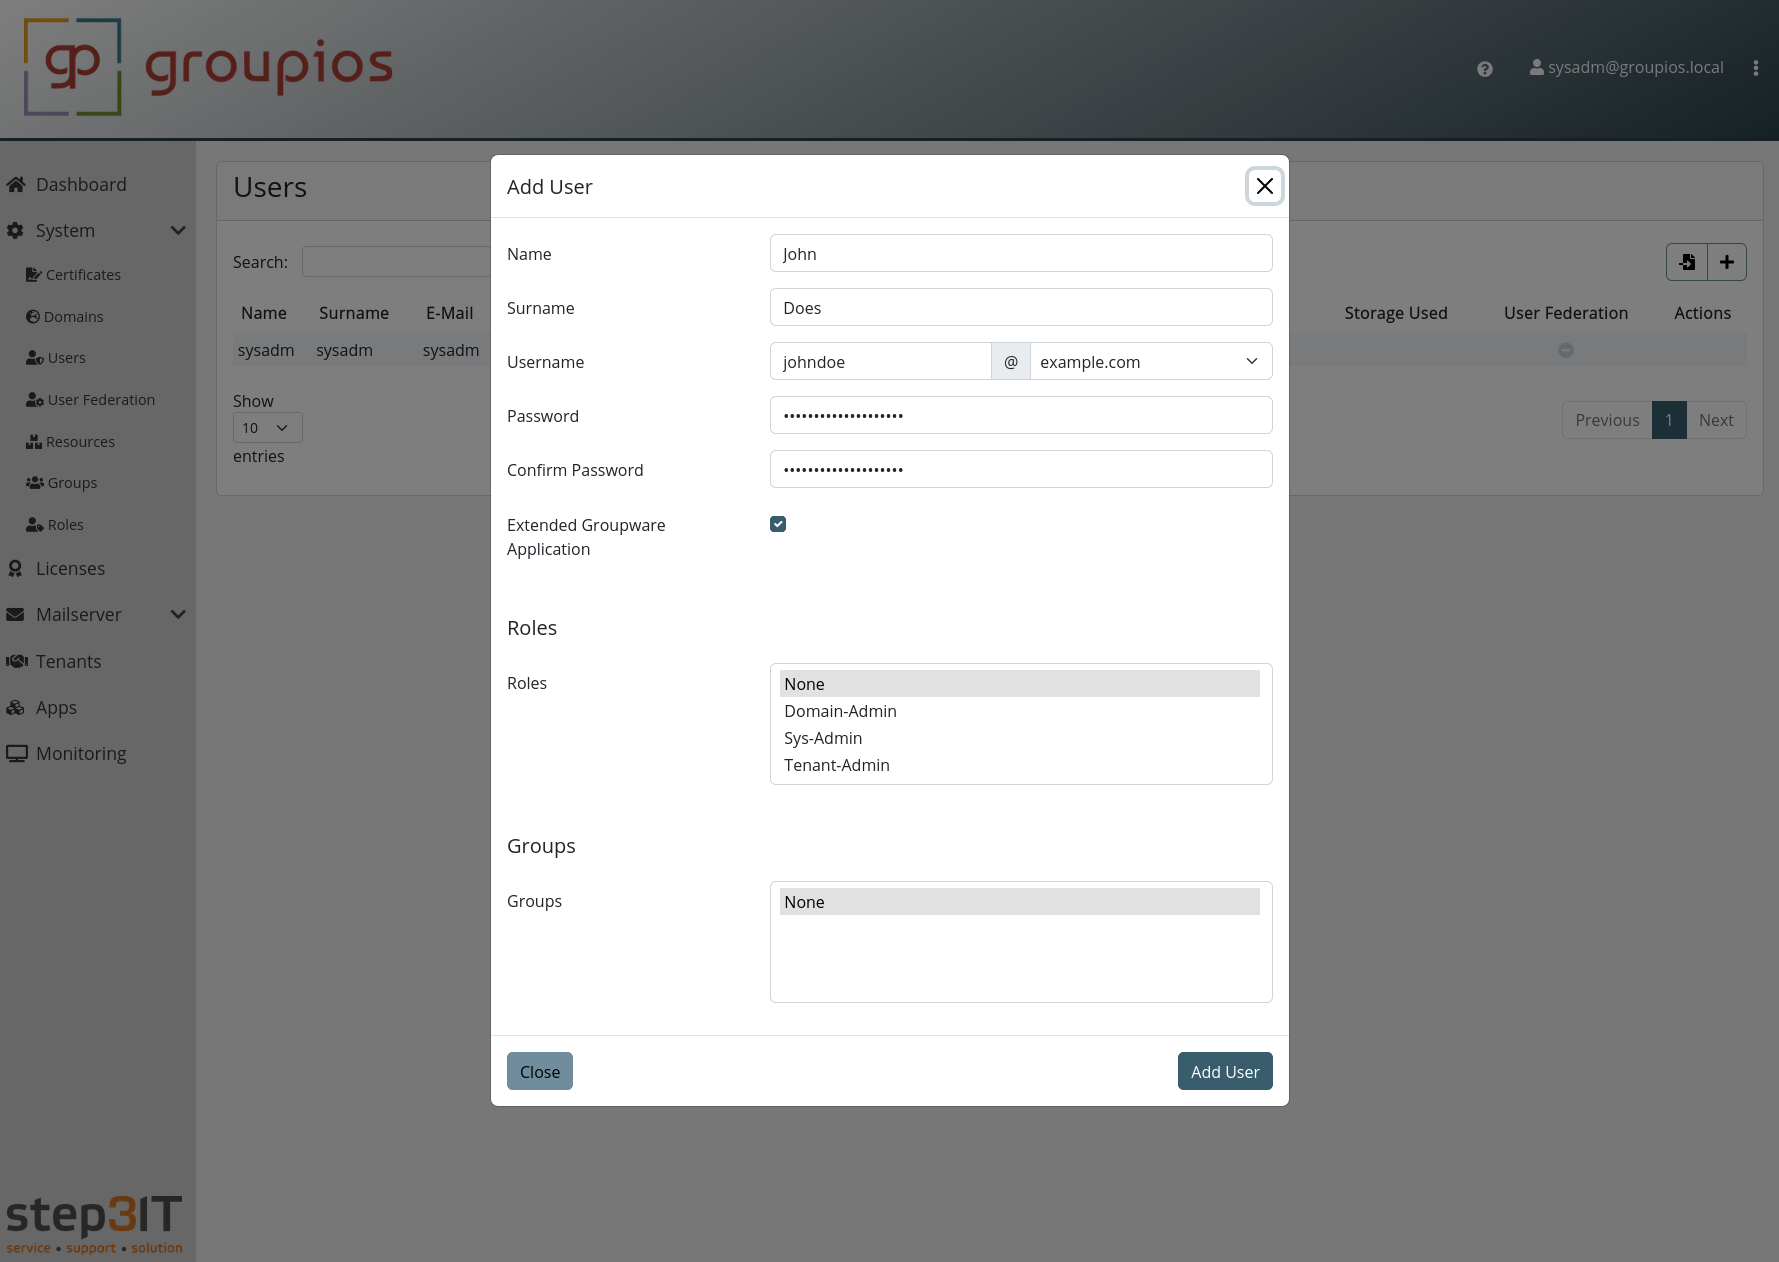
Provide the necessary information as prompted and proceed to confirm the user creation.
Set up your MX Record
As your DNS A record probably already points to the smtp subdomain (smtp.example.com), you need to set your MX record to point to this smtp subdomain.
Set up SPF
Emails are dispatched from the smtp subdomain.
Therefore, it is essential to establish a configuration that permits the IP of this subdomain (smtp.example.com in this example).
For a straightforward setup, we suggest employing a configuration similar to v=spf1 a mx a:smtp.example.com -all on your domain.
For more complex configurations, we refer here.
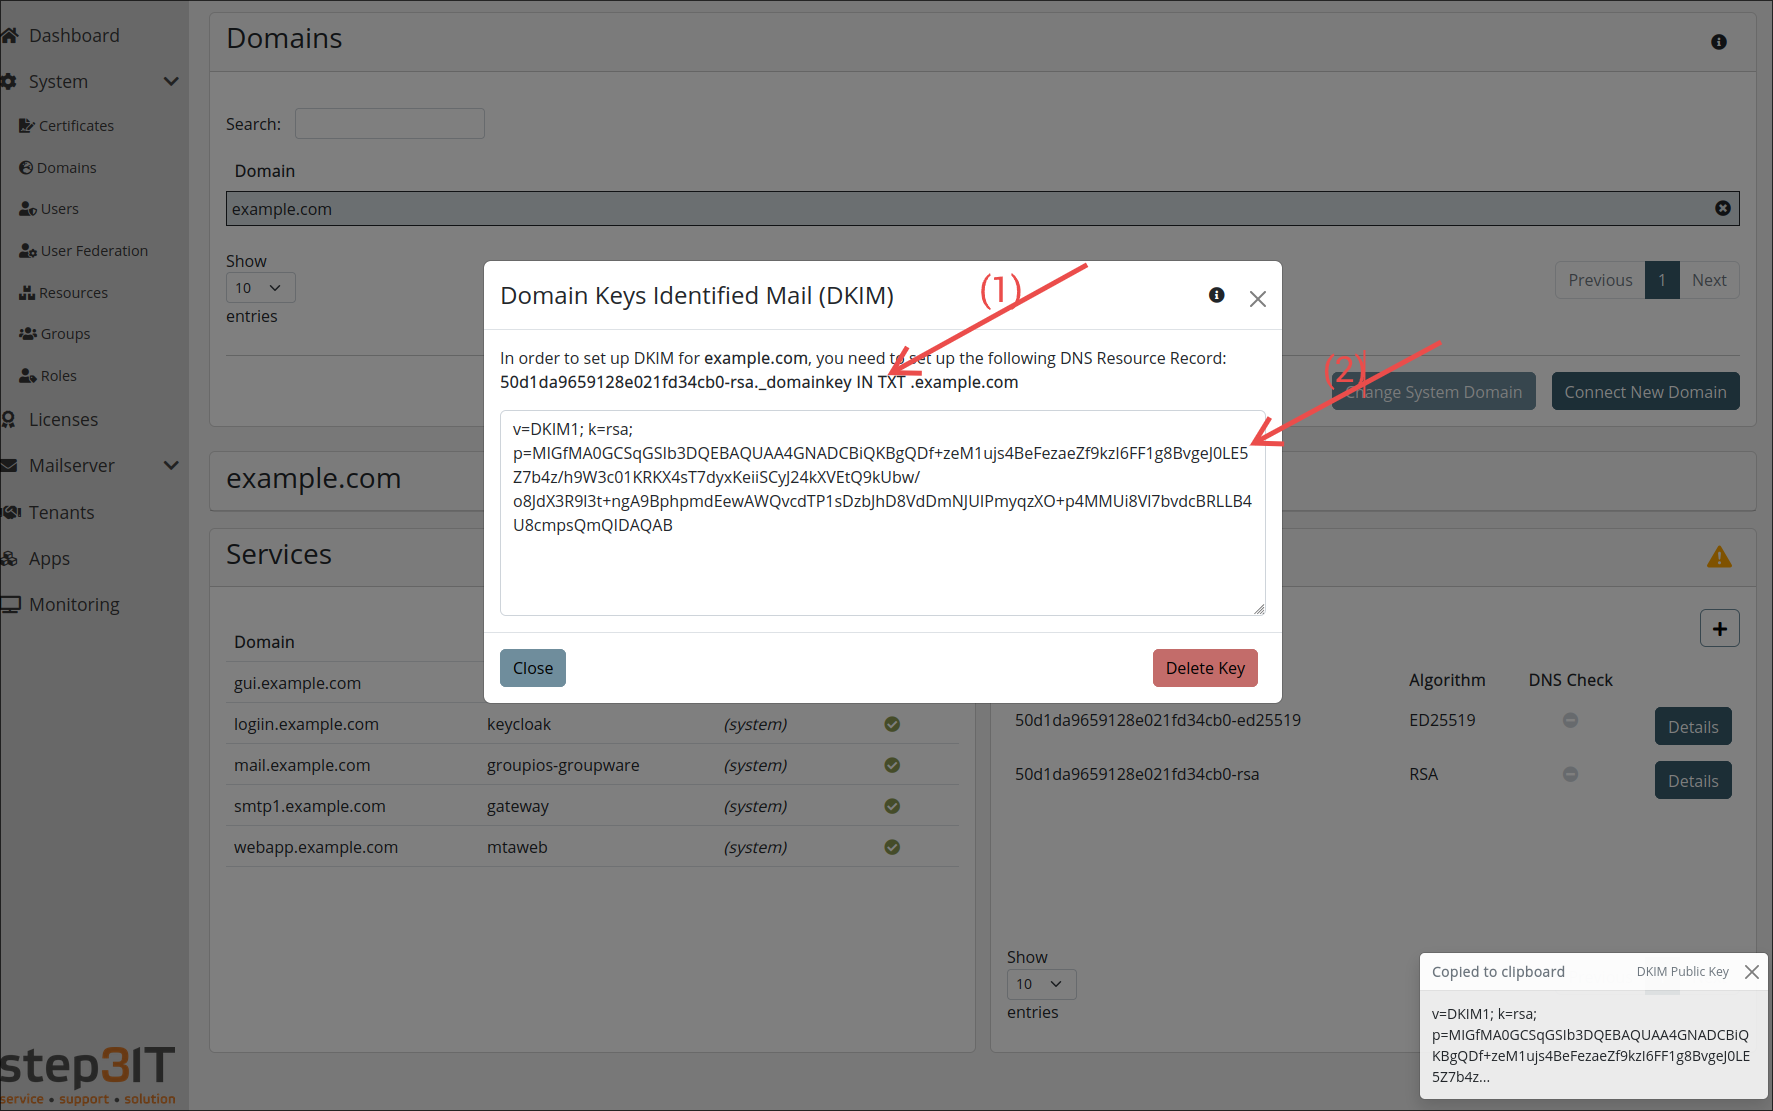
Set up DKIM
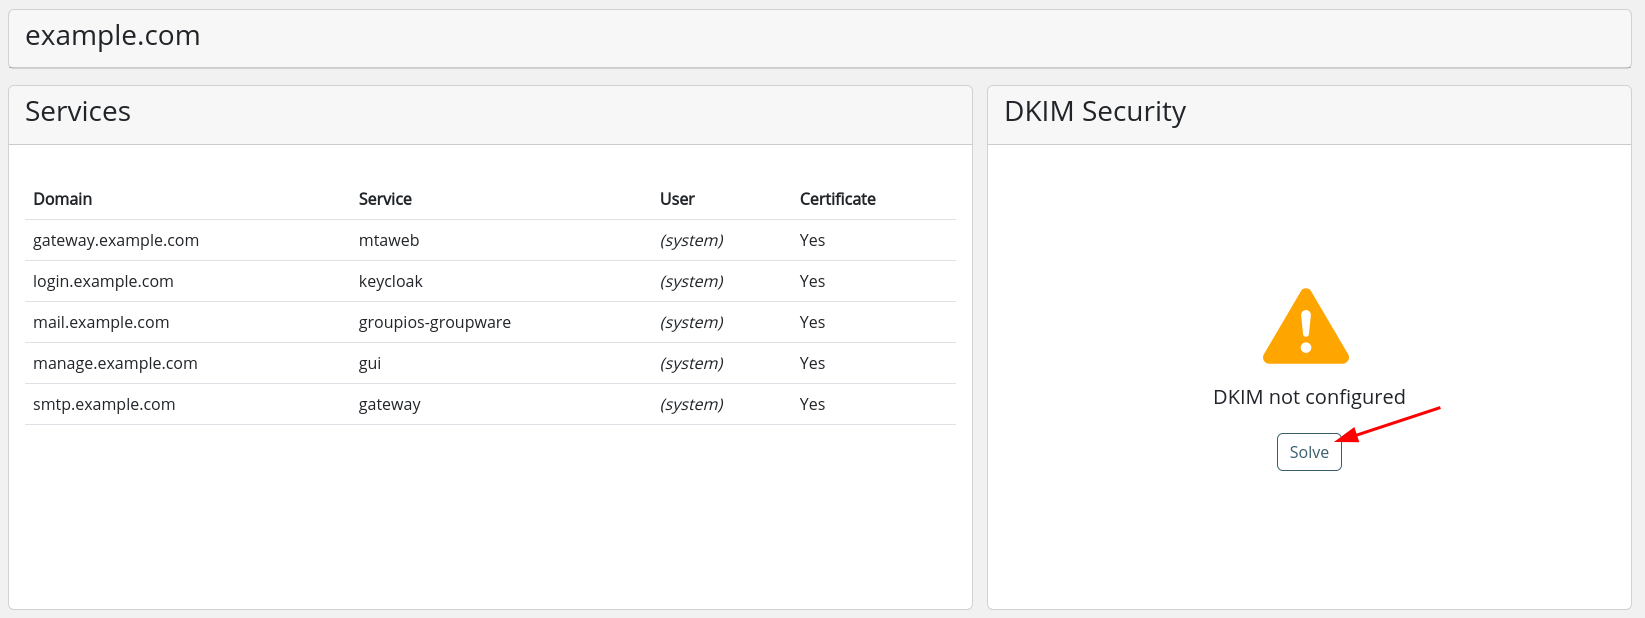
Access the domains view and select the specific domain for which you intend to configure DKIM.

On the DKIM card, click on solve.
Click on
- (1) to copy the subdomain for the DKIM resource record to your clipboard, and
- (2) to copy the value of the DKIM resource record
Use these copied values to register the DKIM resource record with your DNS provider.
Set up DMARC
What is DMARC
DMARC (Domain-based Message Authentication, Reporting & Conformance) is an email security protocol that helps to prevent email spoofing and verify the authenticity of emails. It builds on the existing SPF (Sender Policy Framework) and DKIM (DomainKeys Identified Mail) technologies and allows domain owners to specify how email providers should handle messages that cannot be authenticated (e.g. reject them or mark them as spam). In addition, DMARC provides reports on who is sending emails on behalf of the domain, so that abuse can be recognised at an early stage.
Configure DMARC
To set up DMARC for outgoing mailserver authentication, you need to create a TXT record in your domain's DNS settings under the subdomain _dmarc.. This record defines how unauthenticated emails should be handled.
An example TXT record looks like this:
v=DMARC1; p=reject; adkim=s; aspf=s;
Here:
v=DMARC1specifies the DMARC version.p=rejecttells mail servers to reject unauthenticated emails.adkim=senforces a strict DKIM alignment.aspf=senforces a strict SPF alignment.
Once added, the DNS configuration helps prevent misuse of your domain.
For more information, we refer here.
DMARC Reporting
DMARC reporting provides insights into how emails are being authenticated and whether unauthorized parties are attempting to send emails.
Aggregate DMARC reporting to other servers is enabled with groupios.
Forensic reporting to other servers is not supported as a forensic report may contain data restricted by GDPR.
To also receive reports, we recommend to include a rua tag in your DMARC TXT record to specify the email address where reports should be sent.
For example:
v=DMARC1; p=reject; adkim=s; aspf=s; rua=mailto:dmarc-reports@example.com;
This allows you to monitor email activity and detect unauthorized use of your domain.
PTR Setup
What is a PTR
A PTR record (pointer record) is a DNS entry that ensures that the IP address of your mail server is correctly linked to your domain. Some email providers check this entry to decide whether the sender is trustworthy. If the PTR record is missing or incorrectly configured, our emails may be categorised as spam or blocked. A correctly configured PTR record therefore improves the deliverability of our emails and strengthens the reputation of our mail server.
Configure PTR
To set up a PTR record for the domain smtp.example.com, the entry must be made with the provider of the IP address of the mail server. The PTR record links the IP address of the mail server backwards with the host name smtp.example.com.
To do this, log in to the administration area of the IP provider (e.g. hosting provider or Internet service provider) and create a reverse DNS entry (PTR record) that points the IP address of the mail server to smtp.example.com.
Alternatively, you may just contact your service provider with that request. You should then test the configuration to ensure that the reverse DNS lookup is successful and that the IP address points correctly to the domain.
S/MIME Setup
With groupios version 1.0.105, we integrate S/MIME via CipherMail to provide additional layers of security for your email communications:
- encrypt outgoing messages using the recipient's certificate.
- decrypt incoming messages using the recipient's private key material
- sign outgoing messages using the sender's private key
- verify incoming messages using the recipient's certificate
By managing S/MIME at the server level, our product widely automates and enforces these security policies for your entire organization. This removes the burden from end-users and simplifies administration.
Note
Your groupios license must meet the requirements to use this feature. Contact sales@groupios.com if you are interested.
Install
For installation, navigate to /home/groupios and run the greeter with ./greeter.
Select E-Mail Gateway and then Install CipherMail.
During installation, CipherMail will be downloaded and configured for use with groupios.
./greeter
? Please select an option: E-Mail Gateway
? Please select an option: Install Ciphermail
[... AGPL License Text ... ]
? You are about to install the unofficial-ciphermail-docker-container, do you want to continue? Yes
[... Image information ... ]
? To complete the setup, you need to recreate the core-api. If you skip this step now, you can run it later with: 'docker-compose up -d --force-recreate core-api' Yes
[+] Running 1/1
 ✔ Container core-api  Started                                                                                                                                                          10.4s
? Do you want to start ciphermail? Yes
[+] Running 2/2
 ✔ Container keycloak    Healthy                                                                                                                                                         0.0s
 ✔ Container ciphermail  Started                                                                                                                                                         0.9s
 Installation Finished. Returning back to main menu.
Configuration
On the management interface, naviagte to Mailserver -> S/MIME.
Configuration documentation is continued here.
Uninstall
If installed, you can uninstall via the greeter by selecting E-Mail Gateway and then Uninstall CipherMail.
./greeter
[...]
? Please select an option: E-Mail Gateway
? Please select an option: Uninstall Ciphermail
? Are you sure you want to uninstall ciphermail? Yes
? Should ciphermail related data also be deleted? Yes
ciphermail
? To complete the uninstallation, you need to recreate the core-api. If you skip this step now, you can run it later with: 'docker-compose up -d --force-recreate core-api' Yes
[+] Running 1/1
 ✔ Container core-api  Started                                                                                                                                                          10.5s
 Uninstall Finished. Returning back to main menu.
Explore the Extended Groupware Application
Access the groupware interface by navigating to the designated mail subdomain, illustrated in this instance as mail.example.com and explore the functionalities within the groupware platform.